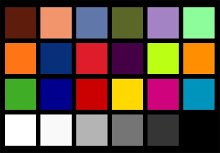
OK. So this might just look like a bunch of numbers on a page. Well, in fact, that's all it really is. A LUT simply changes a unique point of an image into something else. Like, for instance, a grey pixel with a value of 500 (say right in the middle of a 10-bit coded value scale of 1024 values) into a white pixel with a value of 900. A LUT will change luminance (gamma) and chroma (color). And from both of these we get the ability to apply color correction.
The trick here is not to just do simple shot-to-shot color correction (like slightly adjusting exposure and color to match between cuts) but to actually build the look of the scene through manipulating gamma and RGB levels. Sometimes this can be as simple as timing the picture a bit "cooler" or "warmer". Perhaps "crushing the blacks" and "pulling out the saturation" as well.
There are a number of software apps available on today's market that have the ability to generate interactive, real-time color correction with the added benefit of exporting a saved LUT file. Some of the most popular include Truelight, Link Color, 3CP, LightSpace CMS, LiveGrade, and my personal favorite SpeedGrade OnSet (though it has been left to die and just recently resurrected).
These days my preferred workflow is to build a LUT onset via SpeedGrade while monitoring a live feed from the camera. After the look is approved by my Director and DP I export the LUT (usually I build a LUT per each specific scene) into DaVinci Resolve and apply it to the camera original material. Once I've got the look into Resolve I can tweak it a bit further and then match it across different takes and shots to build a cohesive look for the project.
One of the more interesting projects I've worked on recently was a new campaign for feminine products from Kotex. (.......) The spots were constructed in such a way that each 30-second piece included numerous vignettes with their own individual creative look. These spots were directed by Jordan Vogt-Roberts and lensed by Jo Willems. We shot with an ALEXA and a variety of prime lenses including Zeiss Superspeeds, old Cooke Speed Panchros, and a set of Super Baltars. Each look was built from the ground up with a combination of set and costume design, lighting, lens choice, filters, and a creative LUT. Below are stills from the actual LUTs we built and employed on the set (and that were burnt into the dailies for editorial to cut with).
The first LUT we built was meant for a natural look of our comedians on stage. It is a basic Alexa Log C to rec709 transform with a bit of added contrast.

This cheerleader scene was augmented with multiple color grad filters in front of the lens (chocolate soft edge I think). Jo and I pushed the image toward a burnt yellow while simultaneously jacking up the saturation on just the green astro-turf of the field.

The 70's retro look was created with a combination of Super Baltar lens, diffusion filters, and a tweaked out LUT. We lifted the blacks of the image and added a ton of red to them. This has the effect of skewing the rest of the colors and gives the image a sense of old, decaying film stock.

More grad filters were employed for the yoga scene. I think we ended up stacking a chocolate, tobacco, and blue soft edge grad for this shot with an added white promist diffusion filter! Our LUT was fairly reserved as we had built the image up mostly in front of the lens instead of after the sensor.

This final sequence of the stuffy board meeting was tweaked to be a bit drab. Our LUT shifted the color balance towards a cool look while desaturating the image overall.

So after all of this work you've got to wonder if our "look" on the set made it to the "look" of the final aired spot. Go ahead and see for yourself:
So here's a link that will allow you to download some crazy "retro" LUTs (including the one I used for the doctor scene) for your own use (click "File" at the top left of the screen and scroll down to "Download"). Now please remember that these were custom built files that fit a very specific set of circumstances (Alexa, Super Baltars, Diffusion, etc) so these may or may not work for your other material. But once you've got them applied you should be able to tweak your gamma and saturation a bit to get them to look about right.
Have fun!


No comments:
Post a Comment